| |
Beginning with the server installation will make the workstation configurations go more smoothly, since the server will offer key services for use with the workstations. When your computer boots from the CD-ROM, the first screen that appears is a DOS-looking menu. Just hit return; the graphical Red Hat installer will load by default.
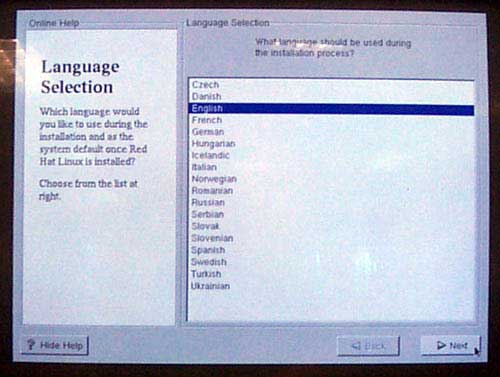
After the Red Hat splash screen, the first screen that asks for user input is for language choice (see Figure below). Like the rest of the installation screens, you get a brief description on the left side of the window, and your selections will take place on the right. Select your default language and push the “Next” button at the bottom, right-hand corner. Next, you choose your keyboard configuration: model, layout, and dead keys. You can probably go with the defaults that the installer selects for you. One the next screen, you will choose your mouse configuration. Like most two-year-old computers, I have 2-button, PS/2 mice, so I choose the generic “2 Button Mouse (PS/2).” If your mouse only has two buttons, you should select the “Emulate 3 Buttons” at the bottom. Next, you are presented with the welcome screen. Read the directions on the left, and then select “Next.”
|
|